The first sip of a coffee shop vanilla latte often disappoints. That artificial sweetness. The milk that tastes scorched. The vanilla flavor that reminds me of a candle. I’ve been there. So I started obsessing over the details—the exact espresso ratio, the milk temperature, the vanilla source. Now I make a vanilla latte at home that I genuinely prefer over any café version. You can too.

The Secret Is the Vanilla
Most shops use a syrup made from water, sugar, and artificial flavoring. It’s thin and cloying. I make mine with a real vanilla bean. Split one bean, scrape the seeds into a saucepan with 1 cup water and 1 cup sugar. Simmer for 10 minutes. That’s it. The flavor is deep, floral, and complex. It doesn’t fight the espresso—it dances with it. Store it in the fridge. It keeps for two weeks. Use 2 tablespoons per latte. Trust me: this single change is the biggest upgrade.
Dialing In the Espresso
A vanilla latte is a milk drink, so some people slack on the espresso. Don’t. Bad espresso ruins everything. I start with 18 grams of fresh medium-roast beans. Grind them fine—think powdery, slightly finer than table salt. Distribute the grounds evenly in the portafilter. Tamp with firm, level pressure. Then pull the shot. I aim for 36 grams of liquid in 25 to 30 seconds. The stream should look like warm honey: thick, slow, and glossy. If it gushes, grind finer. If it drips, grind coarser. The 1:2 ratio is my anchor—it balances sweetness and acidity. When it’s right, the crema is a rich hazelnut color and the aroma fills the room.
Common Mistake: Over-Extracting
If your shot runs longer than 30 seconds, you’ll get bitter notes that clash with the vanilla. Stop at 30 seconds even if the yield is a bit low. Taste it. Adjust the grind next time.
Milk Steaming: The Make-or-Break Step
This is where most home baristas—and many coffee shops—go wrong. They blast the milk until it screams. The result is thin, bubbly foam and a burnt flavor. Here’s my method. Pour cold whole milk into a stainless steel pitcher. Submerge the steam wand tip just below the surface. Open the steam valve fully. You’ll hear a gentle hissing—that’s the air stretching the milk. Keep the tip near the surface until the milk volume increases by about 20%. Then lower the pitcher so the tip is deeper. This heats and textures the milk without adding more air. Stop at 155°F. If you don’t have a thermometer, stop when the pitcher feels too hot to hold for more than three seconds. Tap the pitcher on the counter to pop large bubbles. Swirl it gently until it looks like wet paint—shiny and smooth. The microfoam should be velvety, not stiff.
Why 155°F?
Above 160°F, milk proteins break down. The sweetness disappears, and you get a cooked flavor. Below 150°F, the milk feels thin. 155°F is the sweet spot where the natural sugars in milk shine and the texture is luxurious.
Assembling the Latte
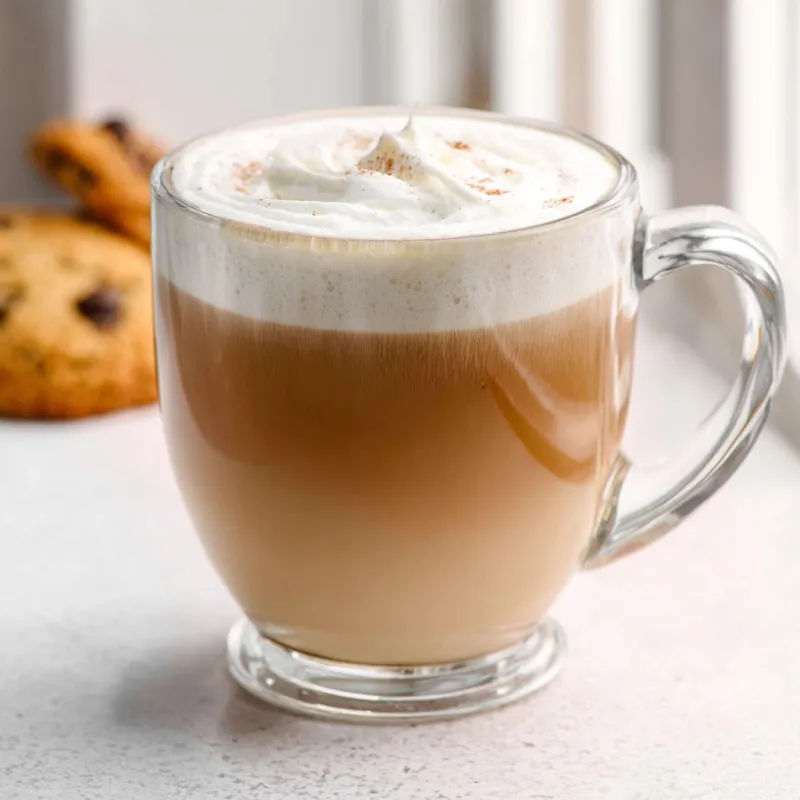
Pour 2 tablespoons of your homemade vanilla syrup into a warm cup. Add the espresso shot. Stir it briefly—just to combine. Then pour the steamed milk into the center of the cup from about 4 inches high. This integrates the milk and espresso. As the cup fills, lower the pitcher and tilt it to create a simple pattern—a dot, a heart, or just a clean white surface. Serve immediately. The first sip should taste like vanilla and coffee in harmony, not one overpowering the other. The mouthfeel should be creamy, not watery. The finish should be clean, with no burnt aftertaste.
Takeaway
A better vanilla latte isn’t about fancy equipment. It’s about precision: real vanilla, a 1:2 espresso ratio, and milk steamed to 155°F. Make these three changes, and you’ll never settle for a coffee shop version again. Handle hot equipment with care. Caffeine affects people differently—if you’re sensitive, consider decaf or a single shot. For personal health decisions, consult a qualified professional.
Frequently Asked Questions
What makes this vanilla latte taste better than a coffee shop version?
Most coffee shops use artificial vanilla syrup and overheat milk, which kills sweetness and creates a burnt flavor. This recipe uses real vanilla bean syrup and precise milk steaming to 155°F, preserving natural sugars and giving a clean, balanced taste.
Can I make this without an espresso machine?
Yes. Use a moka pot or Aeropress with a fine grind to produce a concentrated coffee. Aim for a 1:3 ratio of coffee to water. The texture won’t be identical, but the vanilla syrup and technique still elevate the drink.
Why is the espresso ratio 1:2 and the time 25–30 seconds?
A 1:2 ratio (18g in, 36g out) balances sweetness and acidity. The 25–30 second extraction time ensures proper solubilization—too fast under-extracts (sour), too slow over-extracts (bitter). This is the sweet spot for most medium roasts.
Is it okay to use store-bought vanilla syrup?
If you must, choose a syrup with real vanilla extract listed first. Avoid ‘natural flavors’—they often taste flat. But homemade syrup is superior because you control the sweetness and vanilla intensity.
Better-Than-the-Coffee-Shop Vanilla Latte
Ingredients
Equipment
Method
- Make the vanilla syrup: Combine 1 cup water, 1 cup sugar, and 1 split vanilla bean in a saucepan. Simmer for 10 minutes, then cool and strain. Store in fridge for up to 2 weeks.
- Weigh 18g of coffee beans. Grind to a fine, powdery consistency (slightly finer than table salt).
- Distribute grounds evenly in the portafilter, tamp with firm, level pressure (about 30 lbs).
- Lock the portafilter, place a cup under the group head, and start the shot. Aim for 36g of liquid espresso in 25–30 seconds. The stream should look like warm honey.
- While the shot pulls, pour 8 oz of cold milk into the pitcher. Purge the steam wand briefly.
- Submerge the steam wand tip just below the milk surface. Open steam fully. You’ll hear a gentle hissing—that’s stretching. Keep the tip near the surface until the milk volume increases by about 20%.
- Lower the pitcher so the tip is deeper—this heats and textures the milk. Stop at 155°F (if no thermometer, stop when the pitcher feels too hot to hold for more than 3 seconds). Tap the pitcher on the counter to pop large bubbles, then swirl gently.
- Pour 2 tablespoons of vanilla syrup into your serving cup. Add the espresso shot and stir briefly.
- Pour the steamed milk into the center of the cup from about 4 inches high, then lower the pitcher and tilt to create latte art or simply fill. Serve immediately.